New
Start workflow from Profile page section
Why
Home is currently offering a standard user profile page in which you cannot customize content. To improve the user experience, we are introducing the Profile page builder, a system administration tool for configuring profiles.
In this first development phase of this tool, the system administrator can configure the workflows that users can start from their profile page.
How
You can configure workflows that will be shown to employees in each section of their Profile page.
Log in as a Youforce user with certificate (HR professional with administrator access) and go to System settings / Profile page builder.

By clicking Edit actions, the user navigates to the page where they can select workflows for each section: just click the button Add new action and choose one workflow from the list of available workflows for the company. Workflows can be sorted using the up and down buttons. Removing one of them is as easy as clicking the Remove action link.
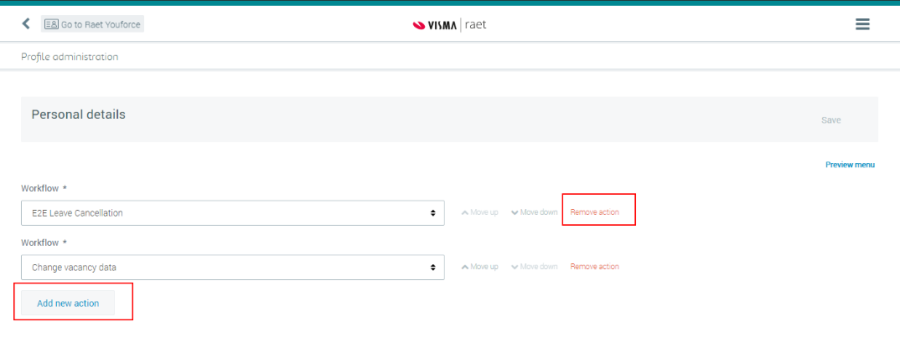
Using the Preview option, the system admin can see how the workflows will be displayed to the employee.

How employees can start workflows from the profile page
The triple dot button is shown in each section of the profile page (next to the title). By clicking the button, a drop-down list is displayed showing the workflows selected for the section. You can start the workflow from there; HR Self Service opens in a new browser tab.
Keep in mind that:
- The button is displayed only if there are workflows configured for the section.
- Only the subset of applicable workflows is shown.

Your action
No additional action is required.
Modified and Improved
Notifications card and Notifications topic page enhancements
Why
To visualize the notifications, we have enriched the information of each notification.
How
Notifications now shows you the picture of the user to which the notification is referring.
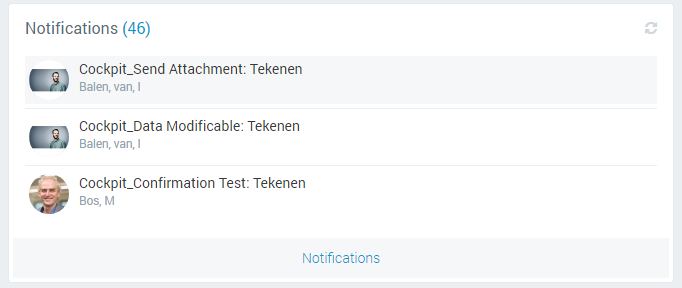
You can open individual notifications directly from this card by clicking on the title. To access other active notifications, you must click on the footer of the card.
Your action
No additional action is required.
Payroll card enhancement
Why
The payroll card was displaying the last 3 documents of the current year. To prevent having an empty card in January, we have removed the year filter.
How
The Payroll card now shows the last three documents regardless of the year.
Your action
No additional action is required.
White Labeling enhancements
Why
We now offer you the ability to customize the appearance of Home to make it more consistent with your organization. You can now change the color of the bar, add your company logo and your own banner, which will be shown to all users on the landing page of Home.
How
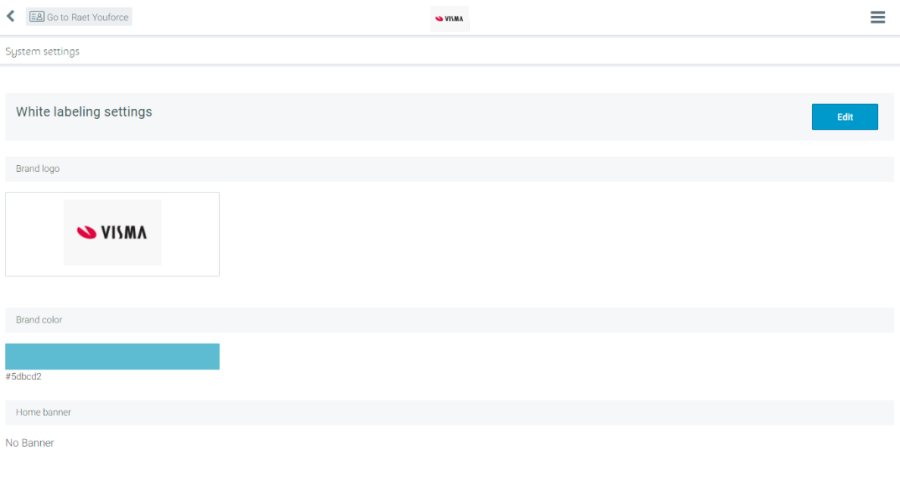
As an administrator of Home, you have a new option called White labeling settings under the Home System settings menu. You can apply the White labeling settings for your company here.

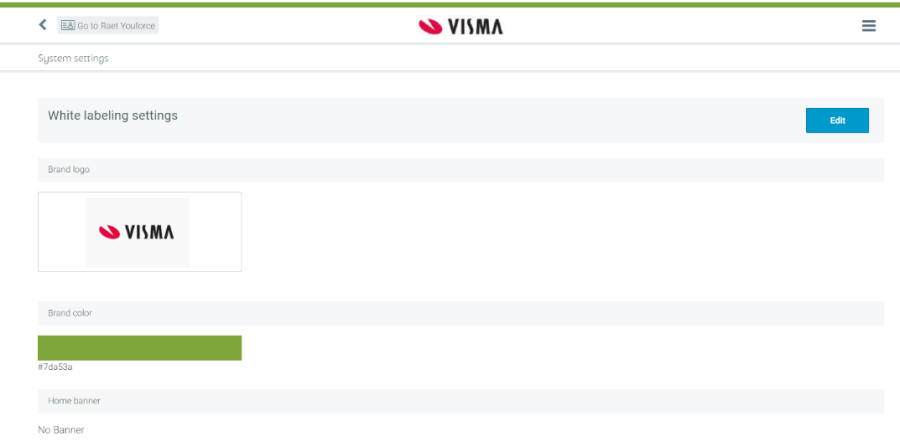
When clicking the White labeling settings option, you will see the 'Visma | raet' brand logo and brand color.
You can change the settings by clicking the 'Edit' option, where you have an option to change the Brand Logo, Brand Color, and Home Banner.


You can choose to change all of them together or to change them individually.
Brand logo
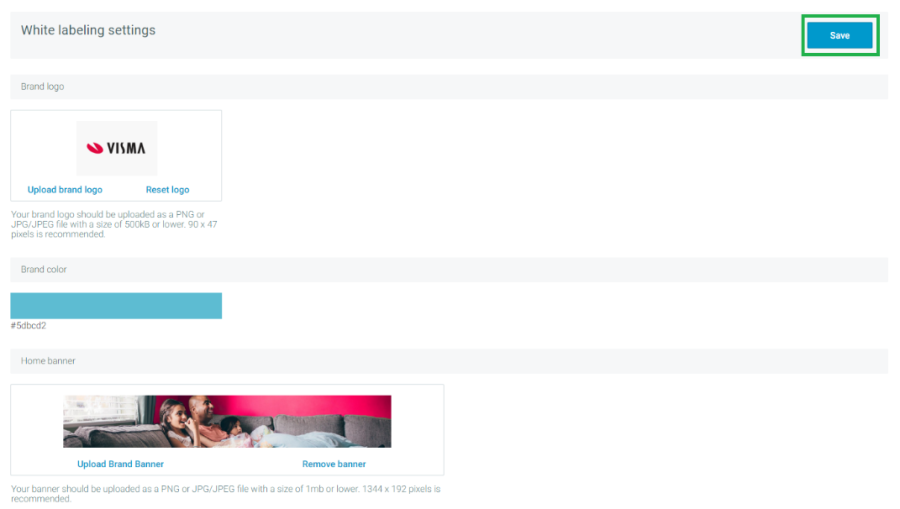
On clicking the Upload brand logo, a dialog box will open in which you can upload your company logo.
Below the brand logo container, you will be shown the recommended attributes of the image:
- Width & height (90 by 47 pixels is recommended)
- The type of images that is allowed (PNG or JPG/JPEG)
- The size of the logo (maximum 500KB)

If you upload a logo that has more than the recommended pixel size, you can change this by cropping the image. While doing this, we show the change in image pixels in W x H (width x height).

On clicking the Select button, the selected logo will be shown in the brand logo container but to save the changes, you will have to click the Save button on the page.

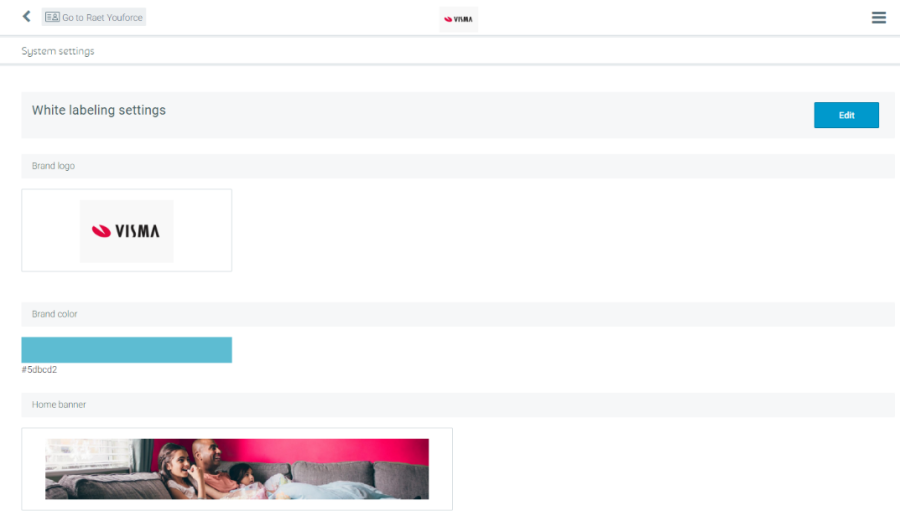
You will be redirected to the view mode after you click Save.
Additionally, you can reset the logo (Undo) by clicking the Reset logo button. This will reset the logo to the default Visma | raet logo.
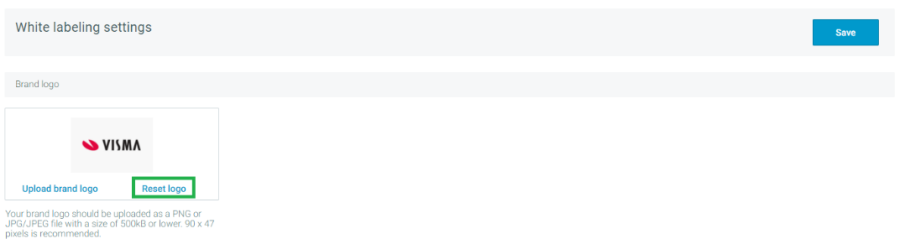
You need to click the Save button to apply the changes.

Brand color
You can also change the brand color of the company by clicking on the colored box. You can then select your preferred color by selecting any of the available colors. You can also enter the hexadecimal value of the color code in the text box.

After selecting your preferred color, you can click outside the colored box and the newly selected color will be shown.

You can click the Save button to apply the changes.
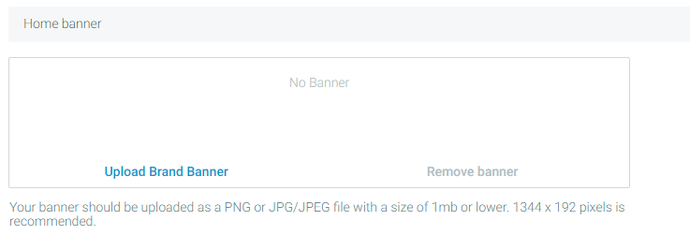
Home banner
When you click the Upload brand banner option, a dialog box will open where you can upload a banner.
Below the brand banner container, users will be shown the recommended attributes of the image:
- Width & height (1344 and 192 pixels recommended)
- The type of images (PNG or JPG/JPEG)
- The size of the banner (max 1MB)

If you upload a banner that is bigger than the recommended pixel size, you can change this by cropping the image. In that case, we show the change in the image pixels in the format WxH (width x height)
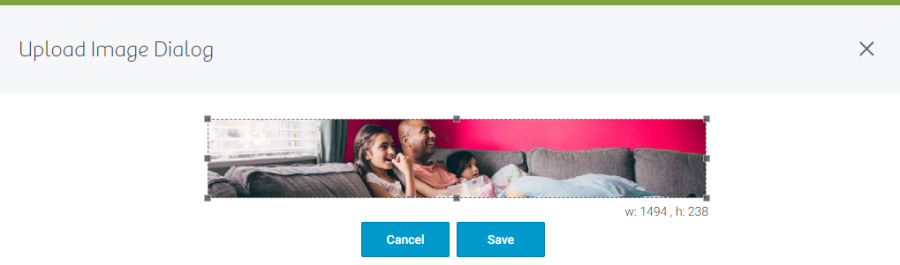
When you click the Select button, the selected banner will be shown in the Home banner container. To apply your changes, click the Save button on the page.
You will be redirected to the view mode after Saving.
You can also remove the banner by clicking Remove banner.

To apply the removal, click the 'Save' button.
Landing page
Once the changes are applied by the System admin, all users within your company will see the newly updated corporate settings.

Preview changes
All changes related to the brand logo, brand color, or home banner are shown in a notification message to the administrator. The administrator can first preview the changes to verify the new look and feel before applying the changes.

Clicking the 'External link' icon in the message will open a new tab in which all of the changes (brand logo, brand color, and/or home banner) will be shown.
Note: This screen is only a Preview screen so all the data that is shown below the banner is a default text without translations (it is only there to give an impression of the page). You have to go back to the White labeling settings page to save the changes.
Important:
- Even though the customer has already configured the White labeling settings in the Youforce portal, they will have to reapply these changes again in the Home application after this release.
- The changes that are now made in Home will not have any effect on the White labeling settings in the Youforce portal applications and vice versa.
- By default, the 'Visma | raet' brand logo and color will be shown if the customer does not apply any White labeling changes.
Your action
The administrator has to configure the White labeling settings for their company in Home, irrespective of whether they have already configured it in the Youforce portal.
Updated Footer component and Responsible disclosure policy
Why
As a result of the acquisition of Raet By Visma, we have:
- Changed the footer component to show the new Visma | raet logo
- Updated the Responsible disclosure policy. On clicking the corresponding link, you will be redirected to the Visma security page, which is in English, irrespective of the language preference of the user
Your action
No action is required.

 Visma Denemarken
 Visma Finland
 Visma Letland
 Visma Nederland
 Visma Noorwegen
 Visma Zweden
 Visma Developers & Partners
 Visma Latijns-Amerika